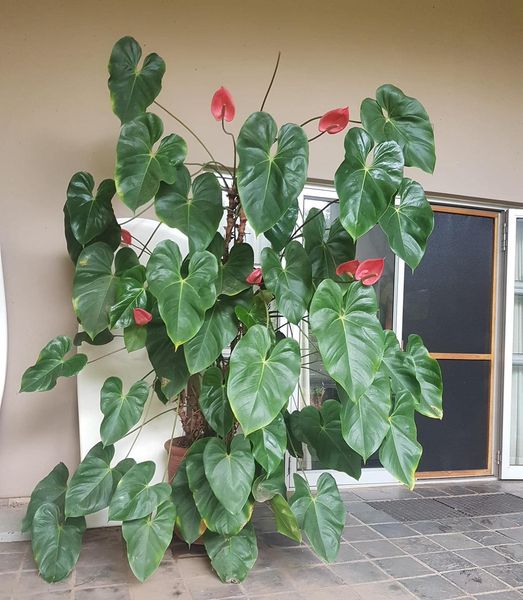
Anthurium plants are a favorite among houseplant lovers because of their beautiful flowers.
So, if you want to have these plants in your house, you can ask your friend for a cutting and propagation. Or if you have this plant you can propagate it to gift to your friends.
In this guide, I will walk you through the methods of Anthuriun propagation with step-by-step instructions, tips, and tricks for success.
Things You’ll Need
You don’t need a specialized lab to propagate your Anthurium; just a few simple tools and materials will be enough.

Here’s what you’ll need:
- Healthy Anthurium plant
- Sharp, sterile scissors or shears
- Potting mix suitable for Anthuriums
- Small pots or containers for planting
- Clear plastic
- Spray bottle
When to Propagate Anthurium?
The best time to propagate your Anthurium is during the growing season, which is typically in the spring or early summer.
This is when the plants are naturally putting out new growth and have the energy to support new developments.
However, Anthuriums can be propagated year-round with appropriate care and attention.
Just be aware that anything ‘out of season’ may take a little longer for the plant to grow.
3 Easy Anthurium Propagation Methods
These are the most popular Anthurim propagation methods.
1. Division
The division is typically used for large Anthuriums that have outgrown their containers.
- Begin by watering the plant a day or two before dividing it. This will help to moisten the soil and reduce stress on the plant.
- Gently remove the plant from its pot and shake off excess soil.
- Use clean, shears to cut the plant dividing the roots into new sections, making sure each new part has several leaves and a healthy root mass.
- If the roots are entangled, you may need to gently tease them apart.
- Re-pot the new divisions into individual containers with fresh soil and water thoroughly.
- Place the newly potted divisions in a warm, humid location with bright, indirect light and keep the soil consistently moist.
- After several weeks, you should see new growth emerging from the divisions.
2. Stem Cuttings
Stem cuttings are the most common method used and are relatively easy.
- Select a healthy stem and use clean, shears to cut just below a leaf node. The cutting should be around 6 inches long and include at least one leaf.
- Remove any flower or fruit from the cutting as these can deplete energy from the plant.
- Optionally, dip the cut end of the stem in a rooting hormone for faster root growth.
- Plant the cutting in a small container filled with moist potting mix, with the node below the surface of the soil and the leaf above.
- Create a mini-greenhouse effect by placing the container in a clear plastic bag or under a humidity dome.
- Keep the cutting in a warm place with indirect light and maintain a high level of humidity. You can mist the cutting with a spray bottle every day or two if needed.
- After a few weeks, gently tug on the cutting. If you feel resistance, this means it has started to root.
3. Aerial Layering
Aerial layering is a method that keeps the new roots attached to the parent plant until they are ready to be cut away.
- Select a healthy stem and make a small incision in the middle of the stem.
- Insert a toothpick into the incision to keep it open and dust with rooting hormone.
- Surround the incision with damp sphagnum moss and wrap it with plastic wrap.
- Wait for roots to grow, usually within a few weeks to a few months.
- Once the roots are well-established, cut the stem below the new root system and pot it up.
Post-Propagation Care Tips
Your work doesn’t end with the planting. Post-propagation care is crucial to ensure the new plants grow.
1. Lighting:
Provide the Anthurium plants with indirect light to encourage healthy growth. Avoid direct sunlight, which can burn the newly growing leaves.
2. Watering:
Maintain even moisture levels, but be careful not to overwater, because this can lead to root rot. Allow the top layer of soil to dry between waterings.
3. Humidity:
New Anthurium plants need a higher level of humidity. You can use a humidifier to maintain the humidity levels.
4. Temperature:
Keep the new plants in a warm environment, away from drafts and sudden temperature fluctuations.
5. Fertilization:
After several months, begin fertilizing your new plants very lightly with a balanced fertilizer to support growth. Remember, they don’t need much to start with.
Common Anthurium Propagation Problems
Propagation isn’t always an easy process. Here are some common problems and how you can fix them.
1. Rotting Cuttings:
This is often due to excessive moisture or inadequate air circulation. So, ensure your potting mix is well-draining and that the cutting has a chance to dry out between waterings.
2. Stem Cuttings Not Rooting:
Sometimes, cuttings can take a while to root. Give them time, but ensure they are in a warm, well-lit environment with proper humidity.
3. Yellowing Leaves:
This might be a sign of overwatering or underwatering. Check the moisture level of the soil and adjust your watering routine as needed.

