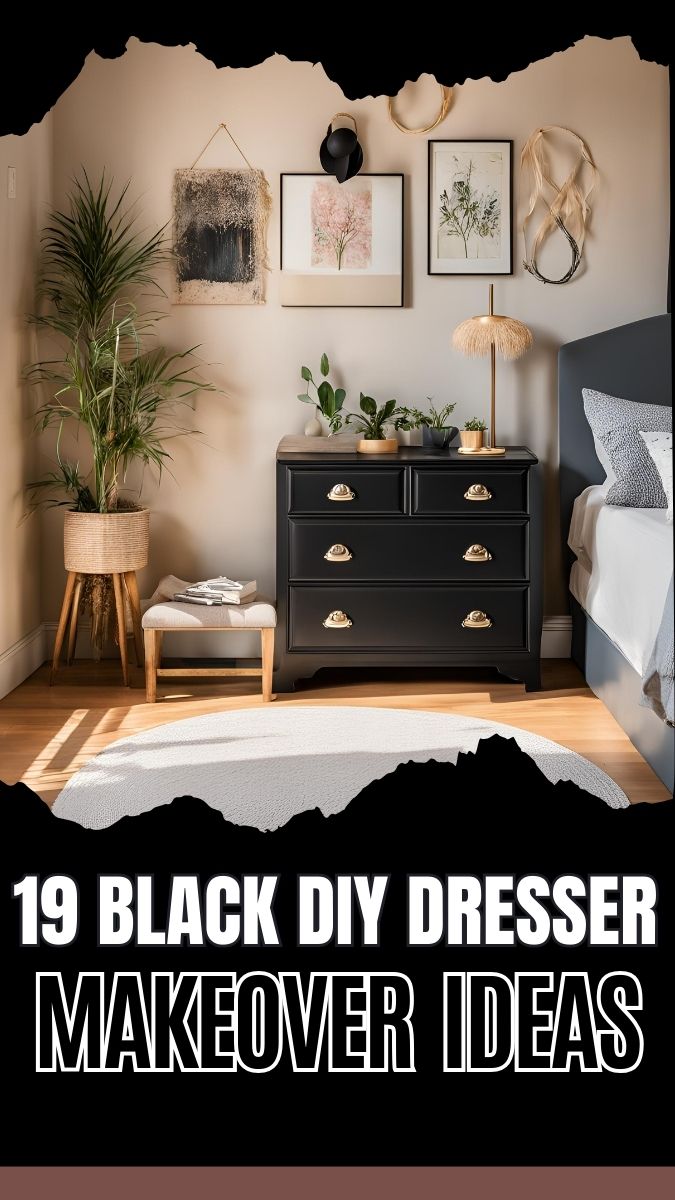
When transforming furniture into something unique and functional, a dresser makeover offers endless possibilities. By using black paint or stain as your foundation, you can elevate an old or basic piece of furniture into a bold statement. Here are 19 professional black DIY dresser makeover ideas. These methods draw from personal projects, expert advice, and proven results. Each idea is practical, creative, and designed to inspire your next makeover.
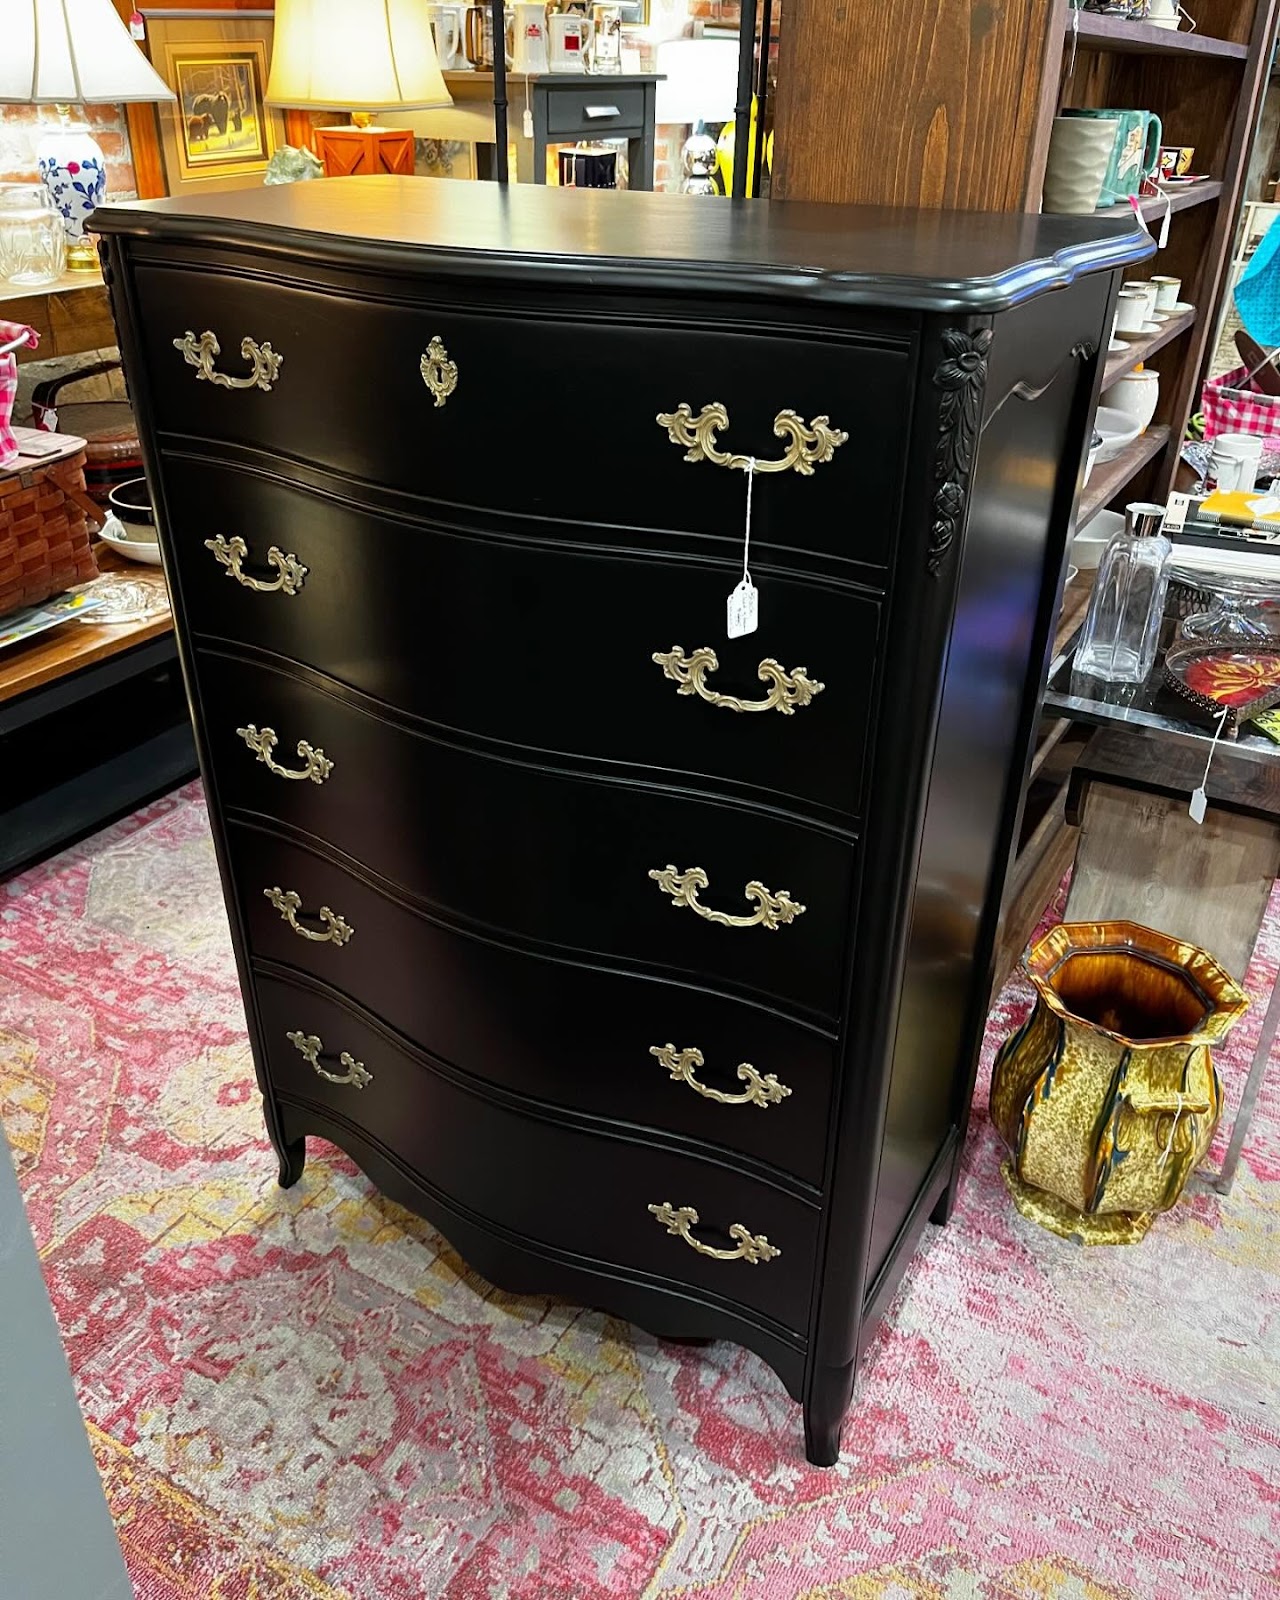
1. Classic Matte Black Finish
Source @rosiesrustics
A matte black finish is a timeless choice that exudes elegance and sophistication. Start by sanding the dresser to create a smooth surface, then apply a high-quality primer to ensure even coverage. Use a premium matte black paint for the final coat, applying two to three thin layers for a flawless finish. I used this approach on my grandmother’s vintage dresser, transforming it into a stunning focal point that complemented my modern decor. Matte black pairs beautifully with neutral tones and metallic accents, making it a versatile option for any room.
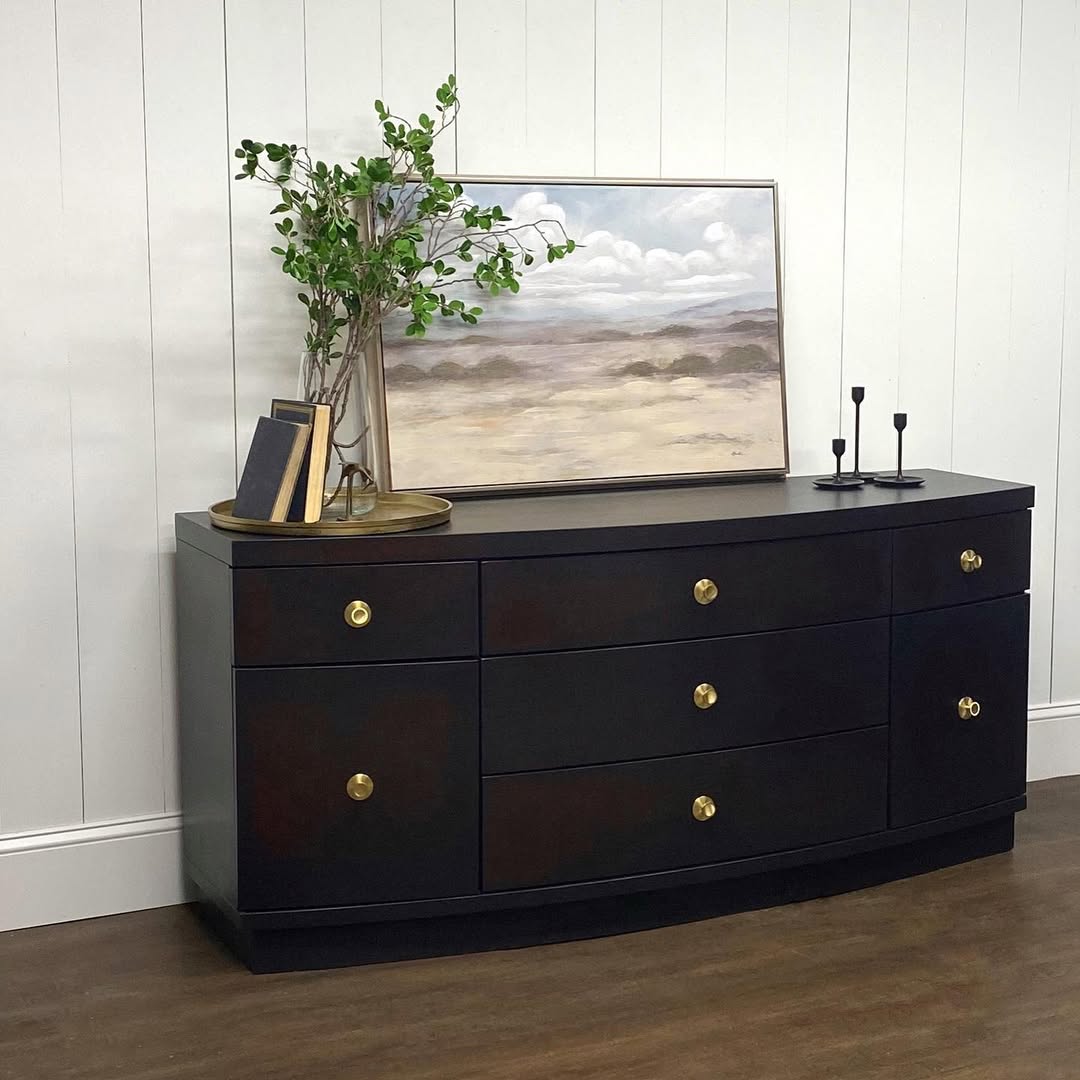
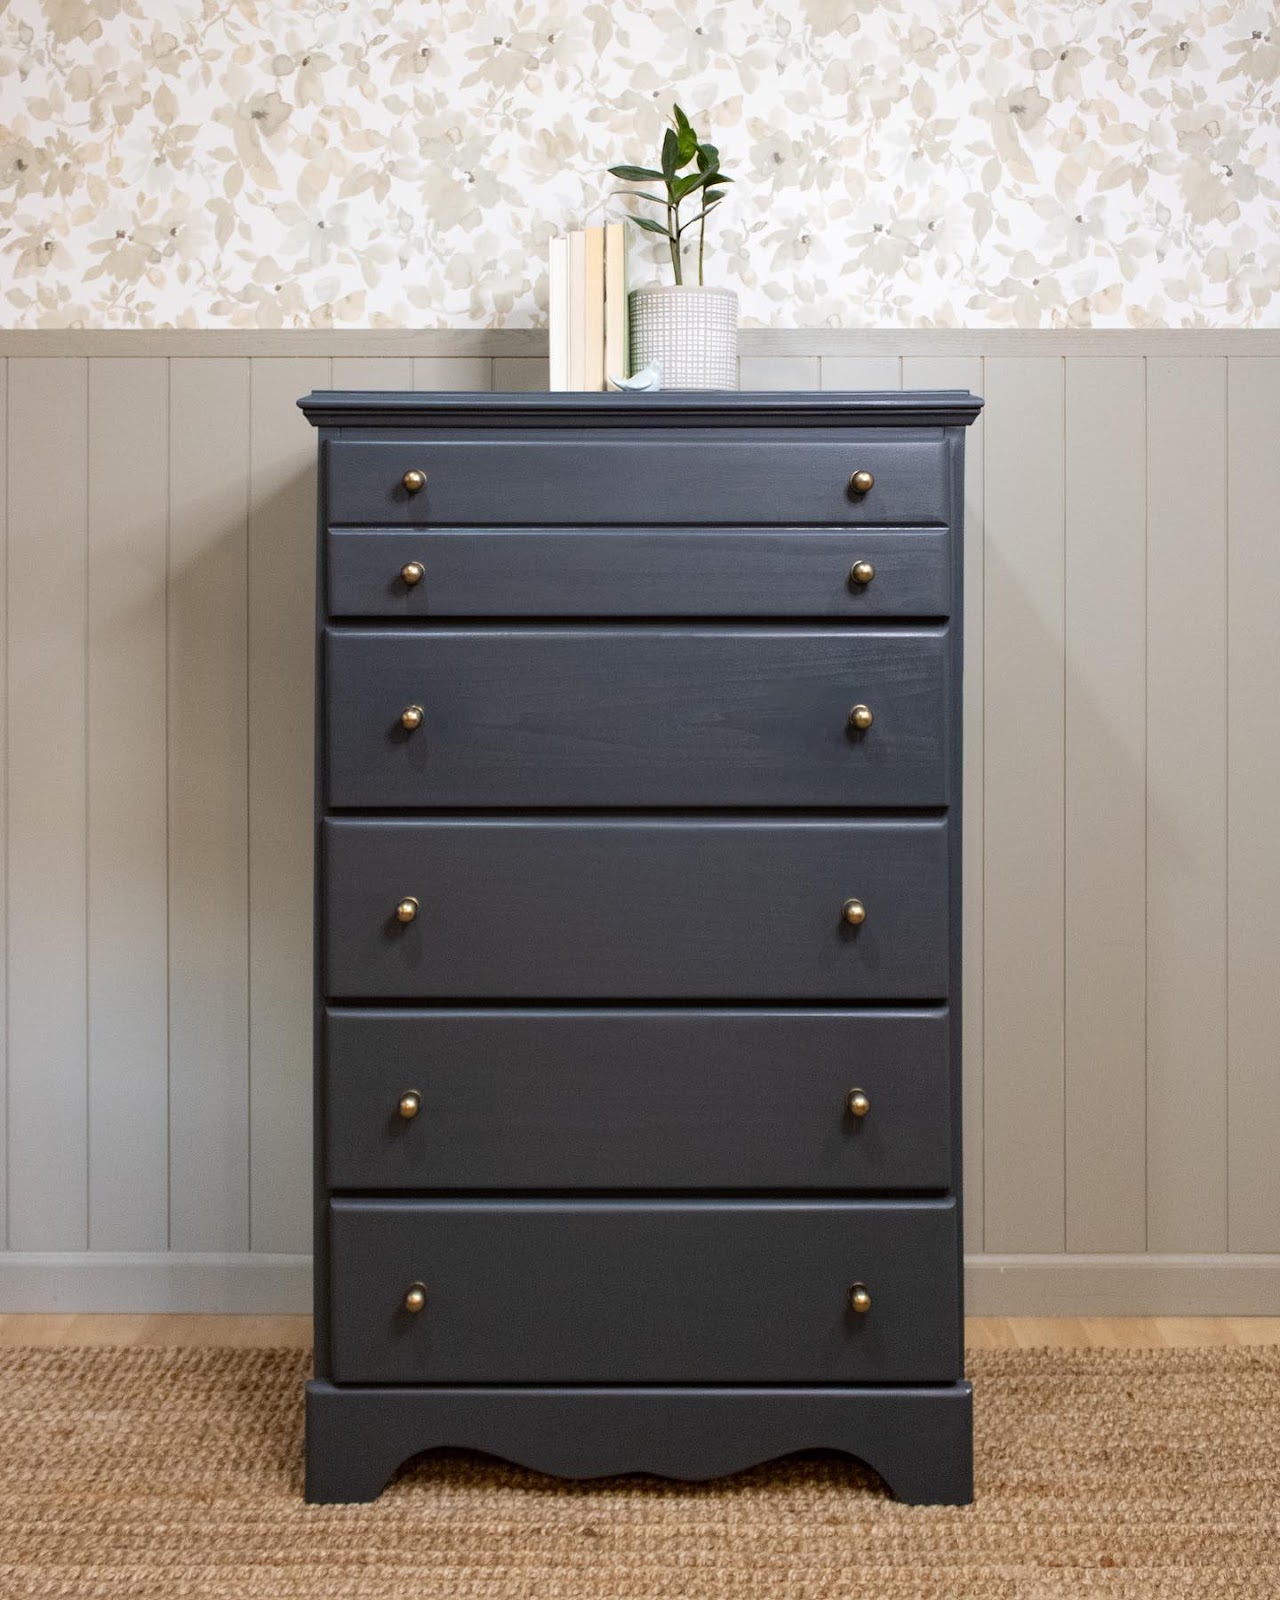
2. Add Gold Hardware
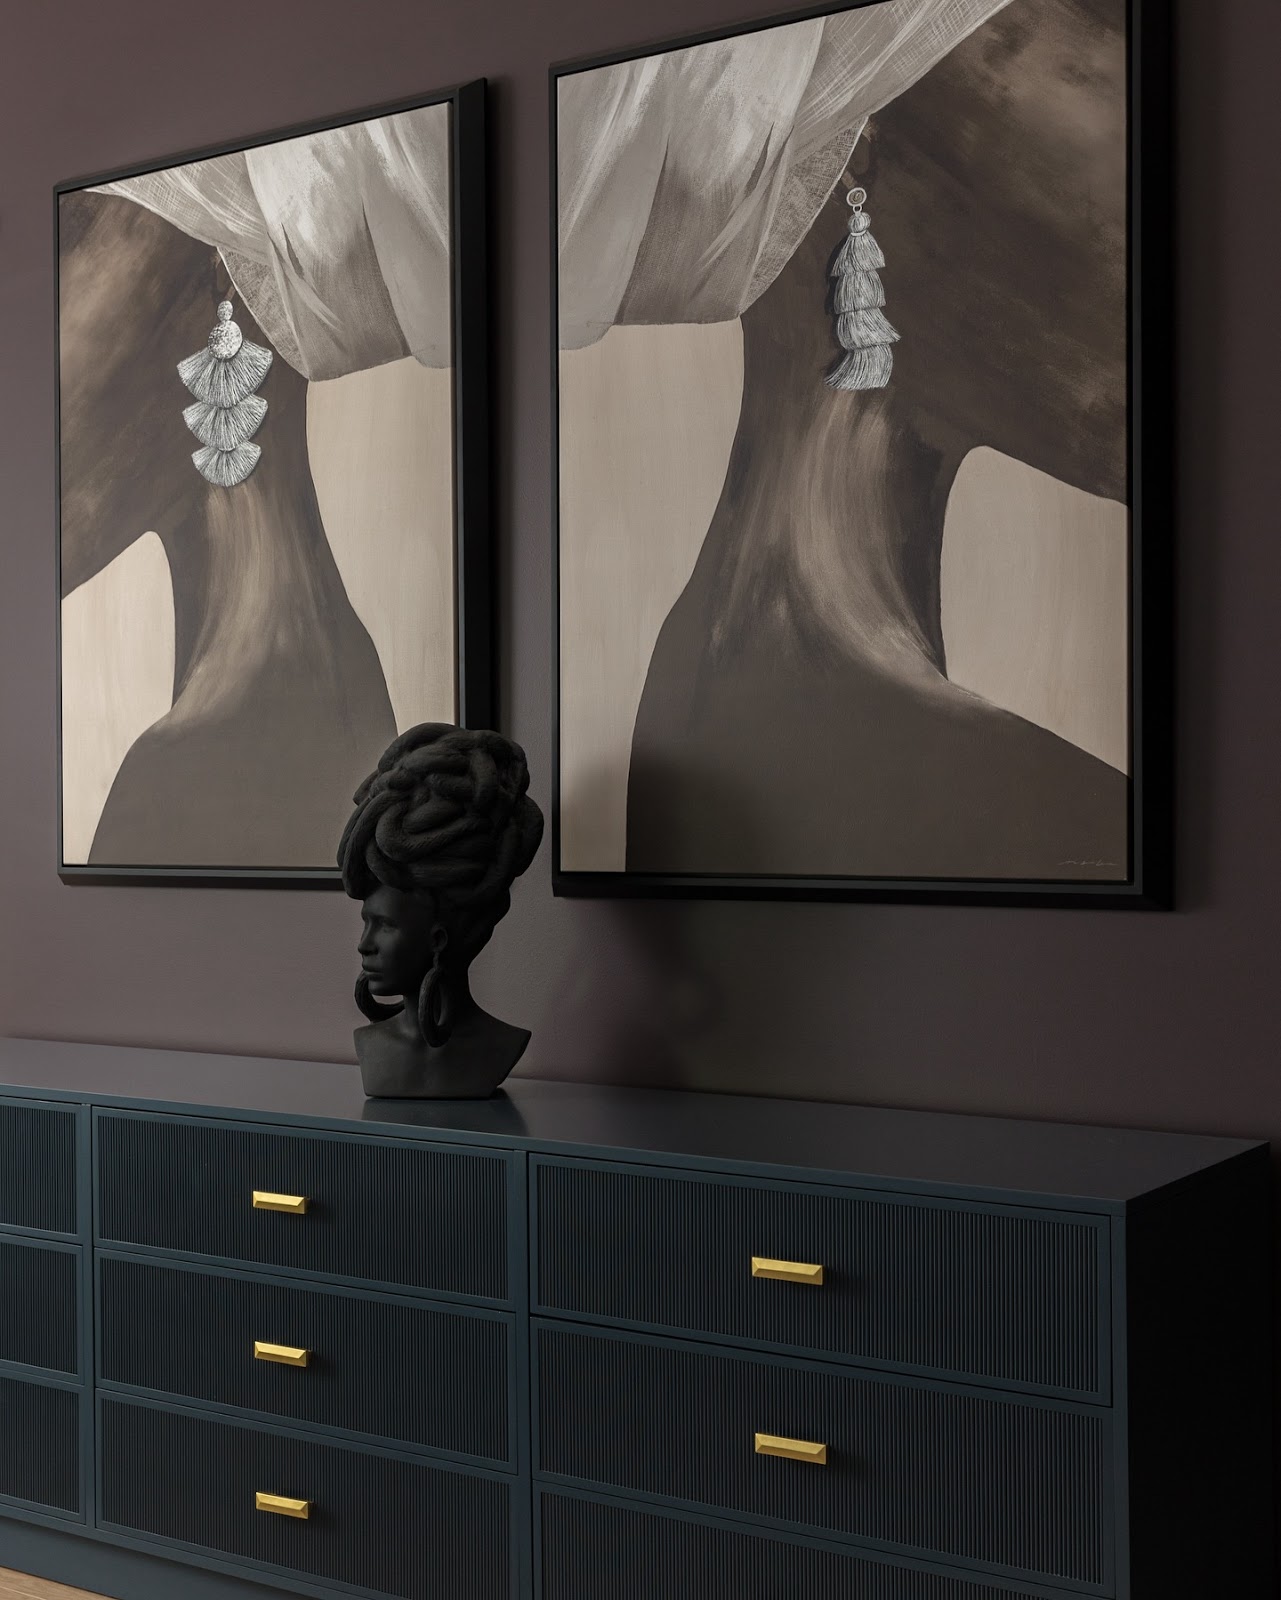
Source @blacklabfurniturerevival
One of the simplest ways to elevate a black dresser is by replacing the existing hardware with gold handles or knobs. This small change creates a luxurious contrast that instantly updates the piece. Look for brushed gold or brass hardware to achieve a contemporary aesthetic. I once refurbished a thrift store dresser using this technique, and the result was a high-end look that rivaled expensive designer furniture. It’s an affordable yet impactful way to upgrade your dresser.
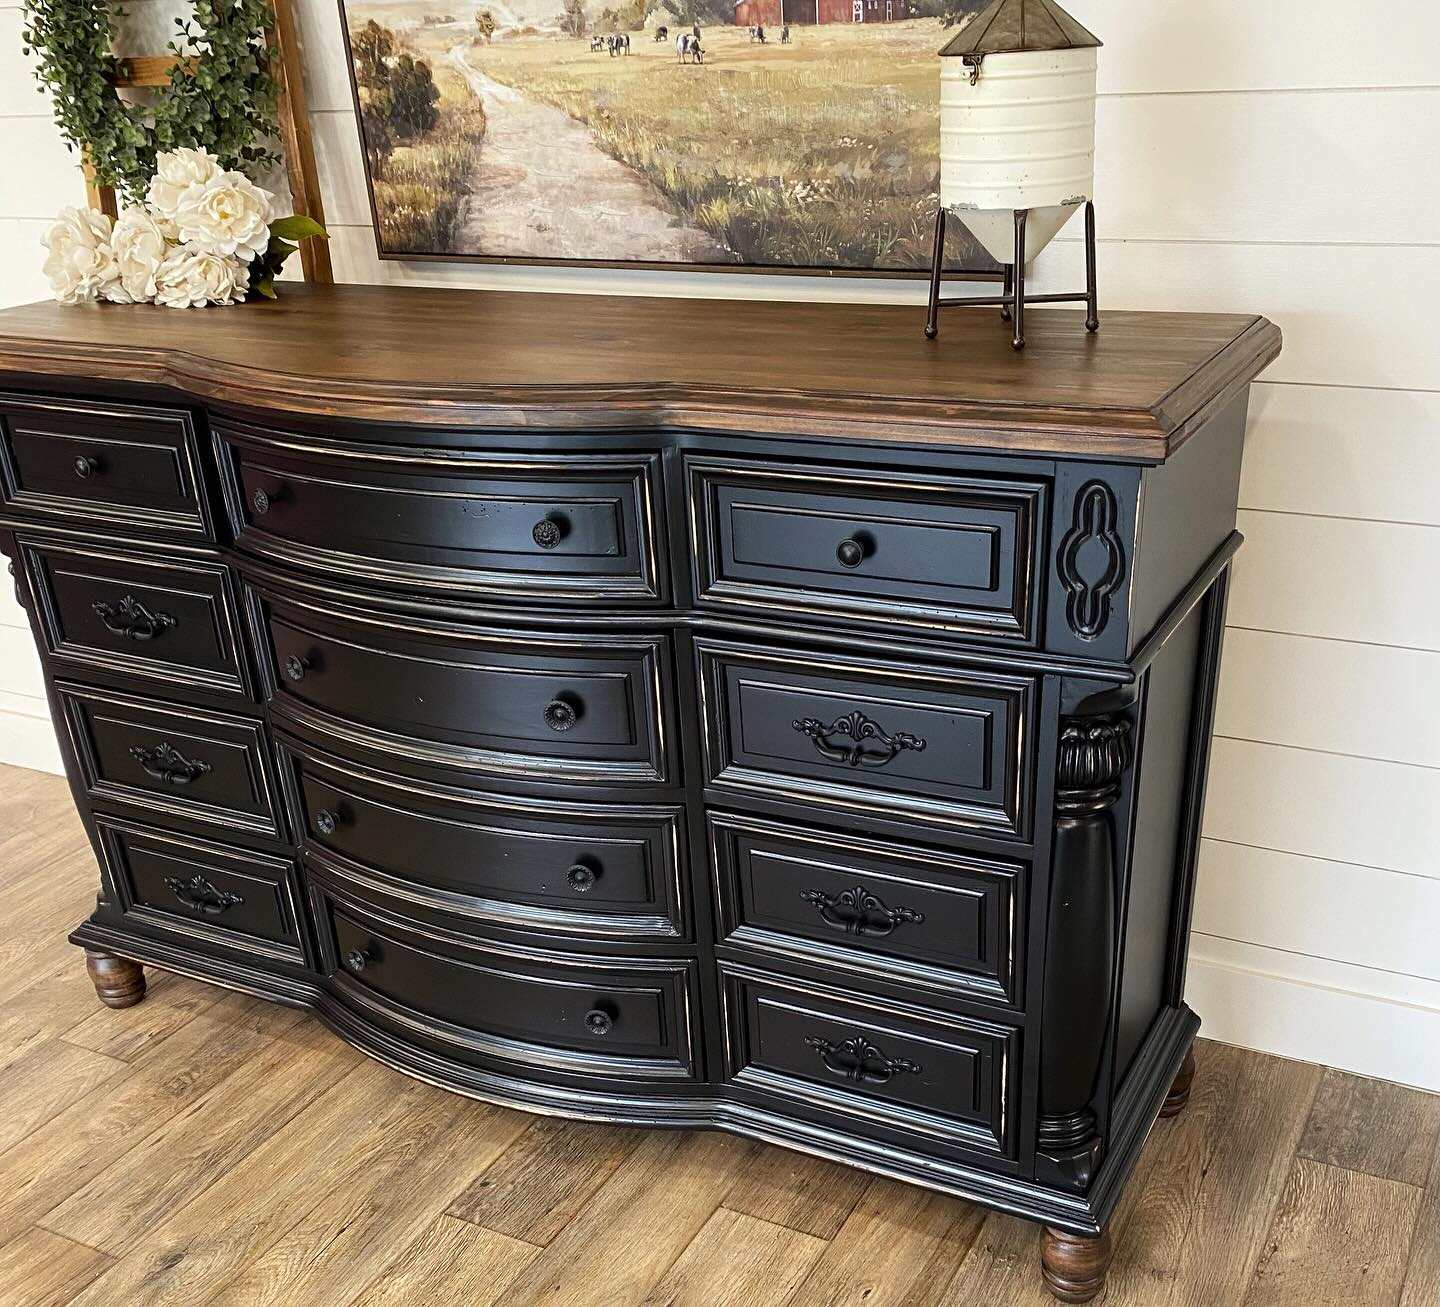
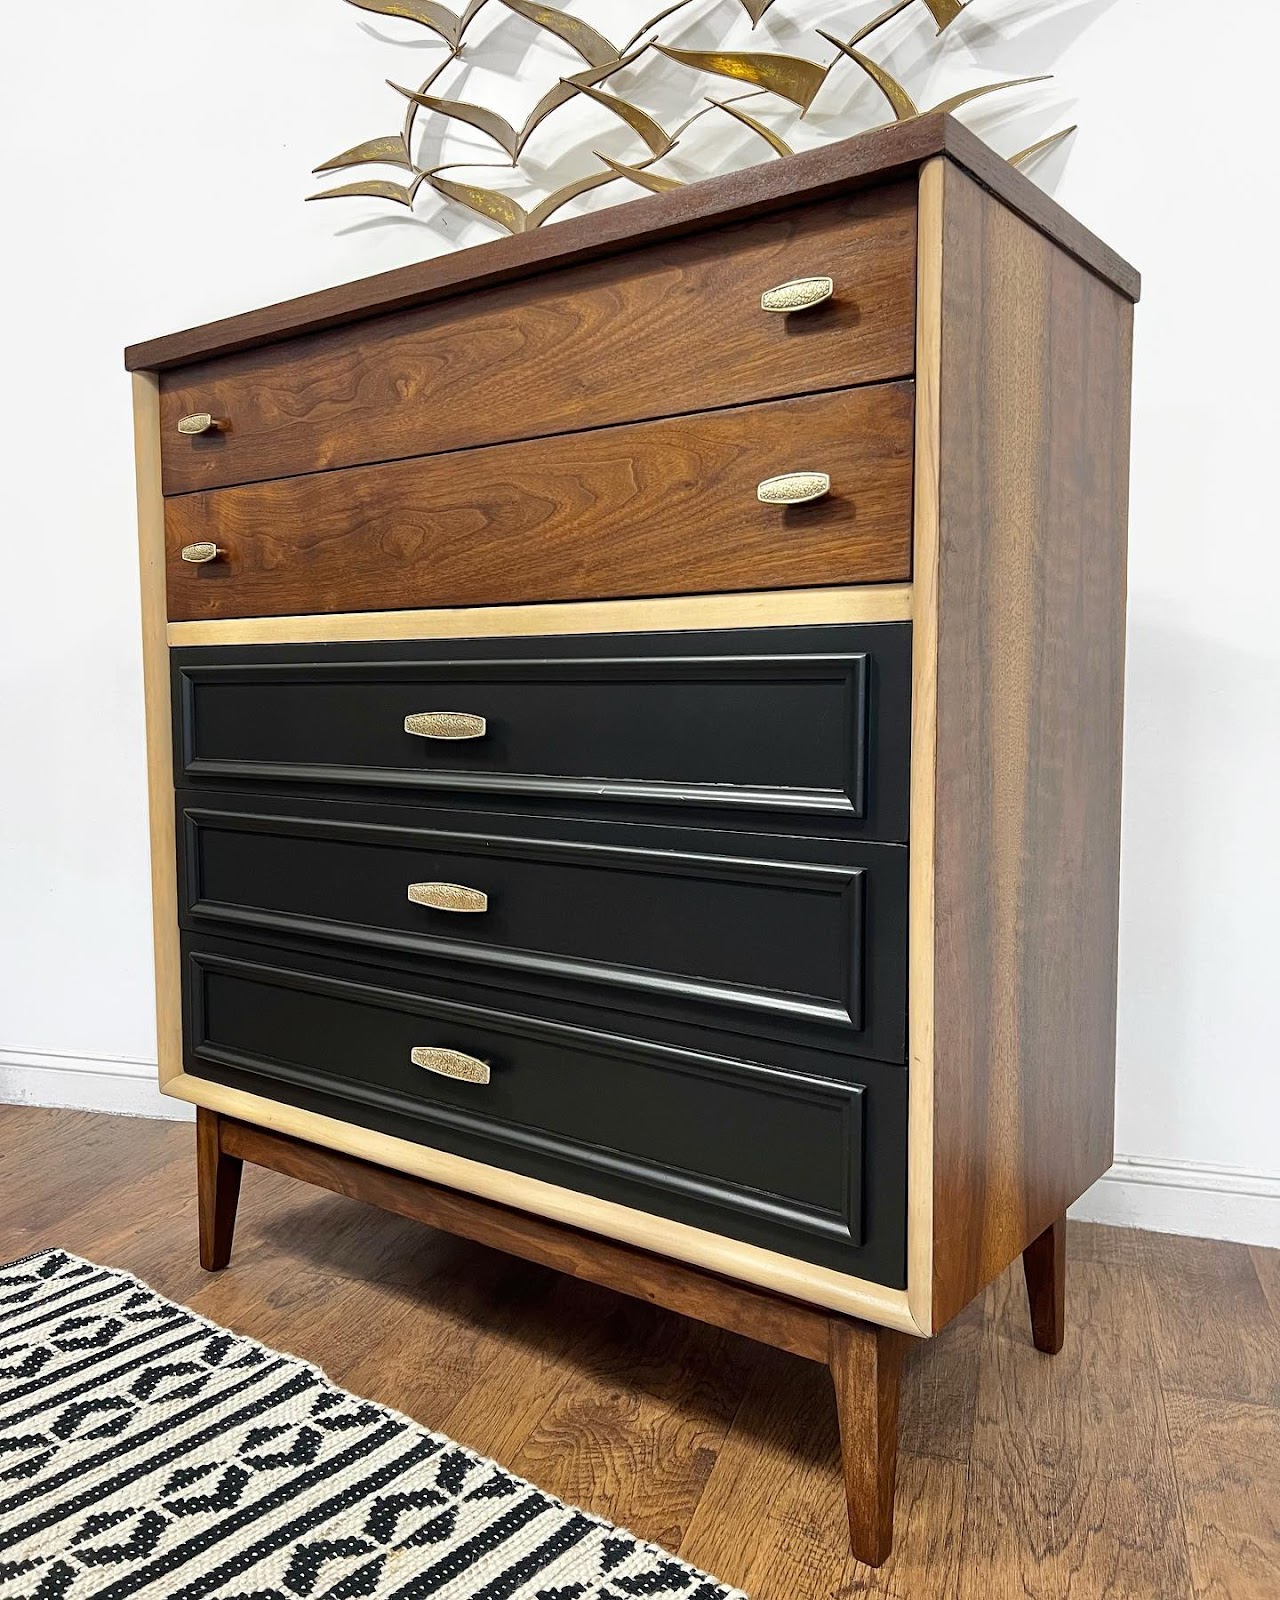
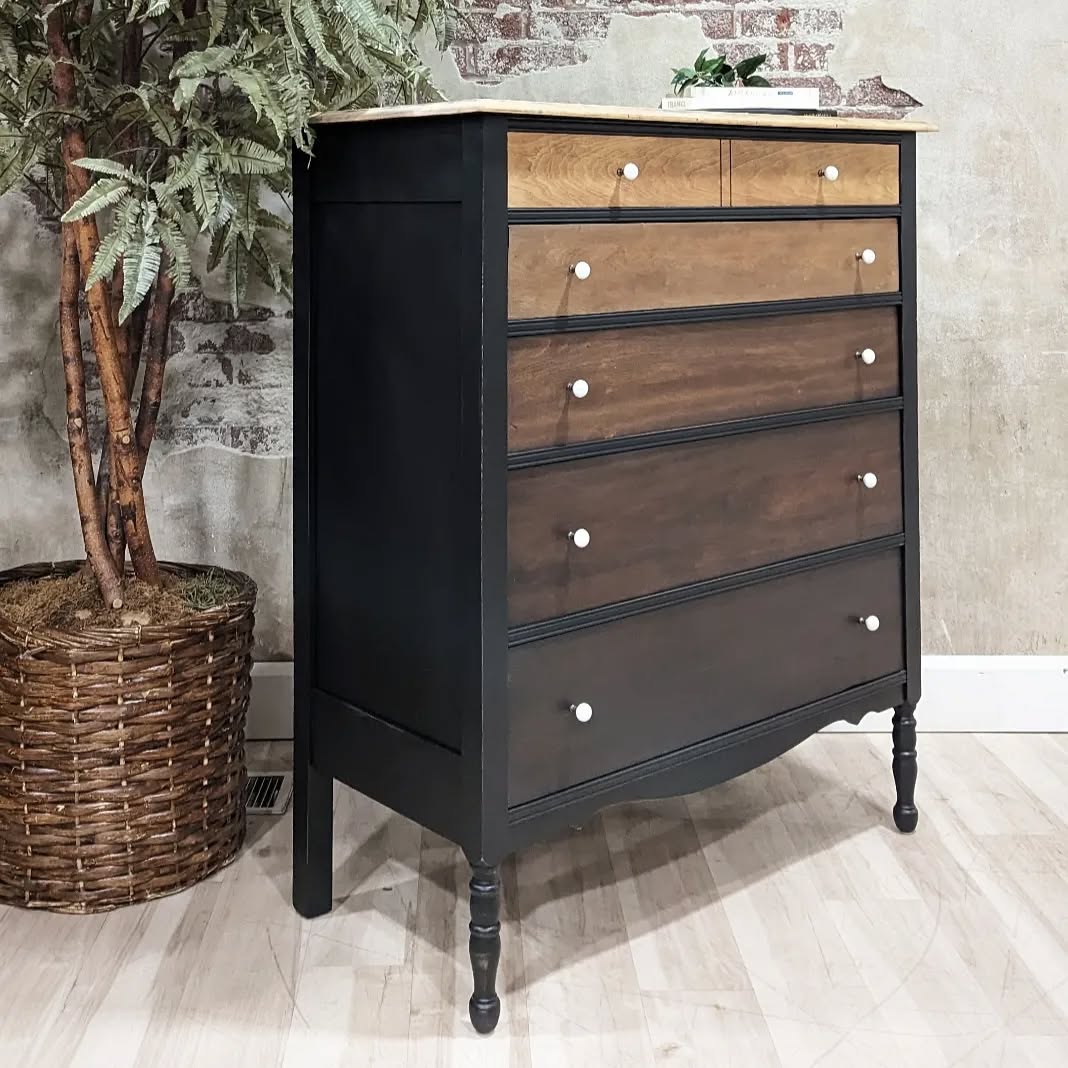
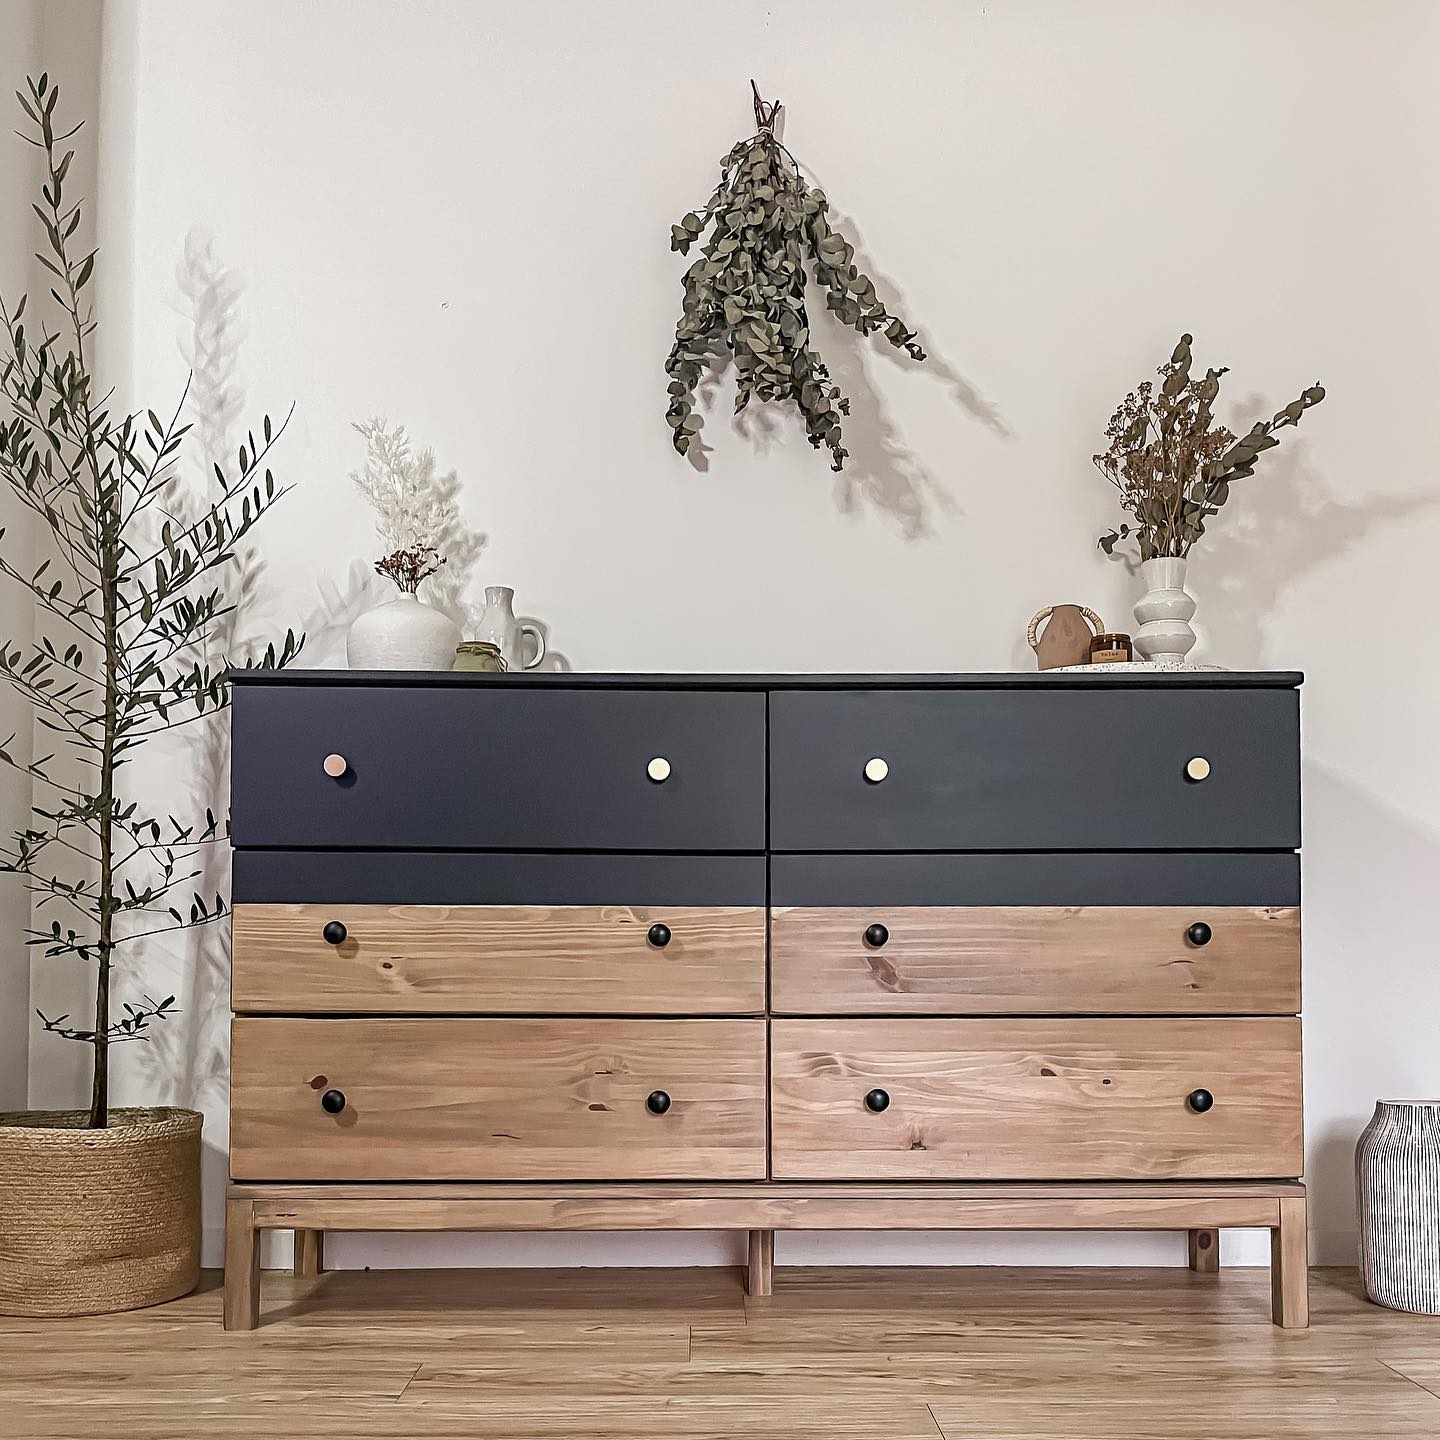
3. Two-Tone Black and Wood
Source @refreshed_by_jess
For a balanced and natural aesthetic, consider combining black paint with exposed wood elements. Paint the dresser’s frame black while leaving the drawer fronts in their natural wood finish. This approach highlights the beauty of the wood grain while adding depth and contrast. I used this method in my bedroom to create a mid-century modern vibe, and the piece has become the centerpiece of the space. Use a clear wood sealant to protect the natural finish and maintain its luster over time.
4. Chalkboard Paint for a Creative Touch
Source @walnutstreethomeco
Chalkboard paint adds an interactive and functional element to your dresser. Perfect for a child’s room or creative space, this finish allows you to write messages, draw designs, or even label drawers. To apply, sand the surface, use a primer, and finish with a few coats of chalkboard paint. I created one for my niece’s room, and it’s become a fun and practical addition where she can express her creativity daily. Pair it with colorful chalk for added functionality.
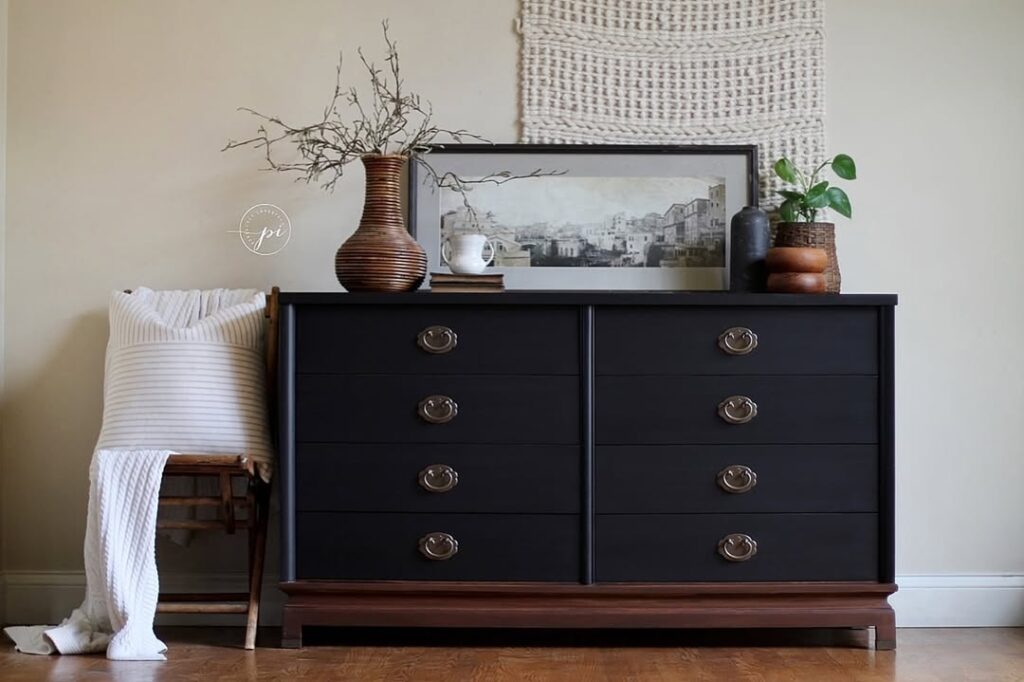
5. Distressed Black Finish
Source @perfectlyimperfectfurnitureres
A distressed black finish adds character and a vintage charm to any dresser. Start by painting the dresser black, then use sandpaper or a sanding block to remove small areas of paint along edges and corners. This technique gives the piece a worn, rustic look that’s ideal for farmhouse or cottage-style decor. I recently used this method for a client’s entryway dresser, and it transformed their space with its rustic elegance. Seal the piece with a matte or satin topcoat for durability.
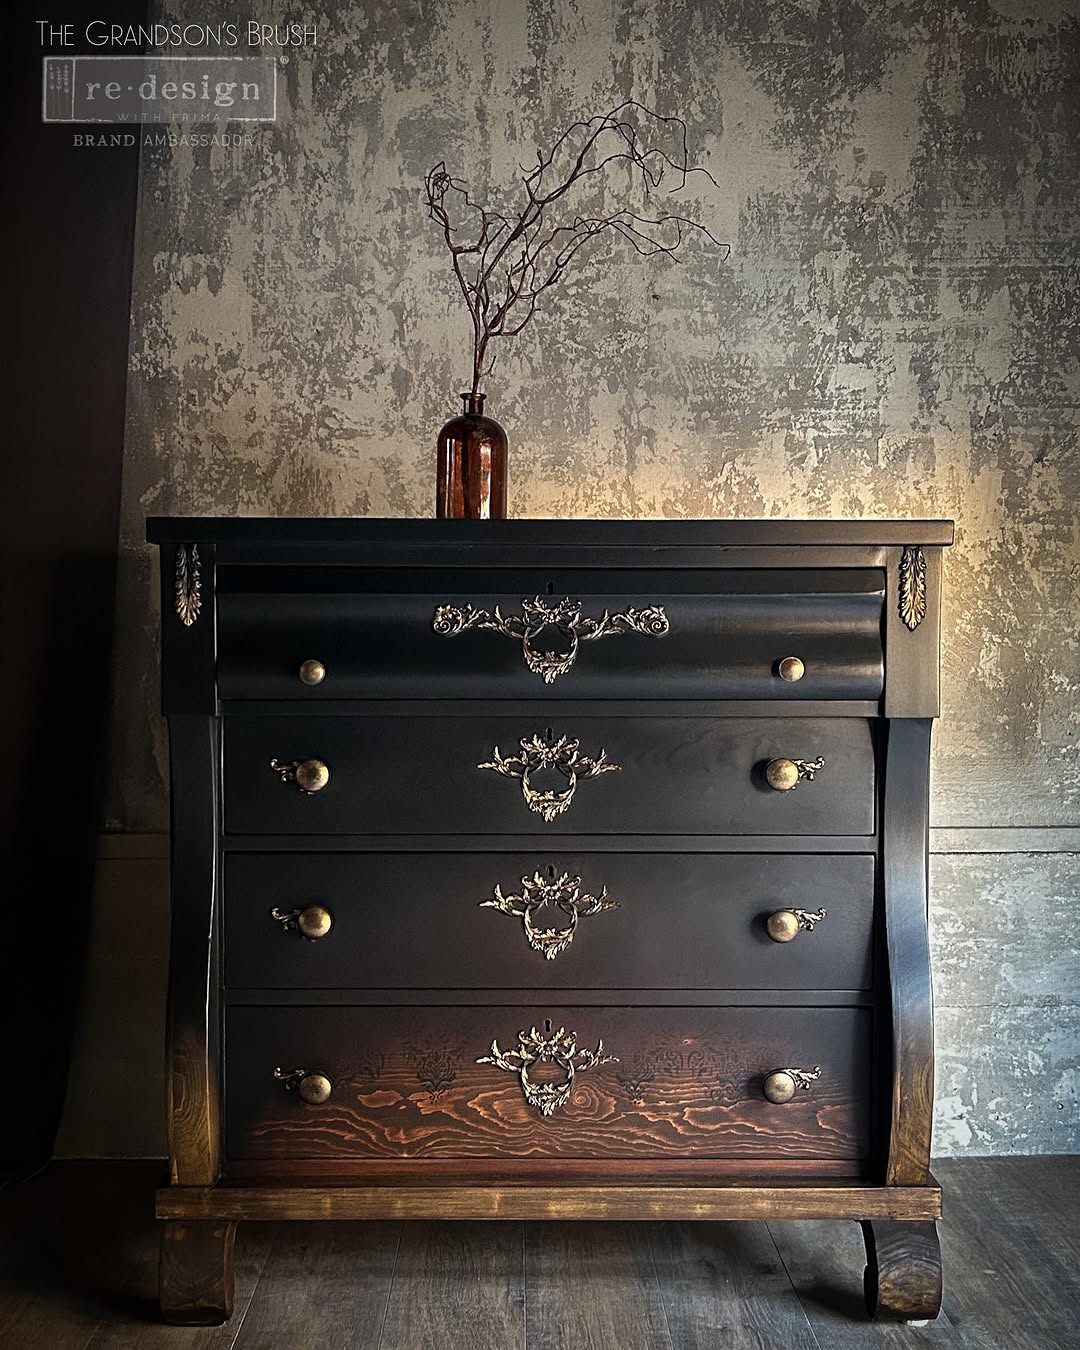
6. Stenciled Designs
Source @thegrandsonsbrush
Stenciling is a creative way to personalize a black dresser. Use stencils to add intricate patterns, geometric shapes, or floral designs to the drawer fronts or top surface. Metallic or white paint contrasts beautifully with the black base, creating a striking visual effect. I once used a Moroccan stencil to revamp a plain dresser for a friend’s living room, and it became an instant conversation starter. Stenciling allows you to experiment with different styles while adding a custom touch.
7. Ombre Effect
Source @trwmodernvintage
An ombre effect adds a unique artistic flair to your dresser. Gradually blend shades of black, gray, and white to create a gradient that transitions seamlessly across the surface. This technique works well on dressers with multiple drawers, as each drawer can represent a different shade. I experimented with this approach in my studio, and it became a standout piece that showcases creativity and craftsmanship. Use a sponge or blending brush for smooth transitions between colors.
8. Black with Mirrored Drawers
Source @vintageconceptdesign
Adding mirrored panels to the drawer fronts is a bold and glamorous upgrade. Mirrors not only enhance the dresser’s appearance but also reflect light, making the room feel brighter and more spacious. I worked on a client’s bedroom dresser using this technique, and the reflective surfaces elevated the entire room’s aesthetic. Use adhesive mirror tiles or have custom-cut mirrors installed for a professional finish.
9. Raised Molding

Source @ebonybasten
Adding decorative molding to the drawer fronts creates texture and visual interest. Cut and attach wood trim in geometric or classic patterns before painting the dresser black. This technique transforms a basic piece into a sophisticated, high-end design. I tried this on an old garage dresser, and the result was a dramatic makeover that looked straight out of a furniture catalog. Finish with a satin or matte topcoat for added durability.
10. Painted Patterns
Source @misspixiesdc
Hand-painting patterns or designs directly onto the dresser’s surface adds a playful and unique touch. Choose bold, contrasting colors or subtle, complementary tones depending on your style. I painted a chevron pattern on a client’s dresser, and it brought a vibrant energy to their space. This method requires patience and precision but delivers one-of-a-kind results that truly stand out.
11. Replace the Legs
Source @ebonybasten
Replacing the dresser’s legs is an easy way to modernize its look. Swap out bulky or outdated legs for sleek metal or tapered wooden ones. This simple upgrade dramatically changes the overall style and feel of the piece. I updated an IKEA dresser with brass legs, and it now looks custom-designed. Be sure to choose legs that complement the dresser’s proportions and overall design.
12. Add Upholstery
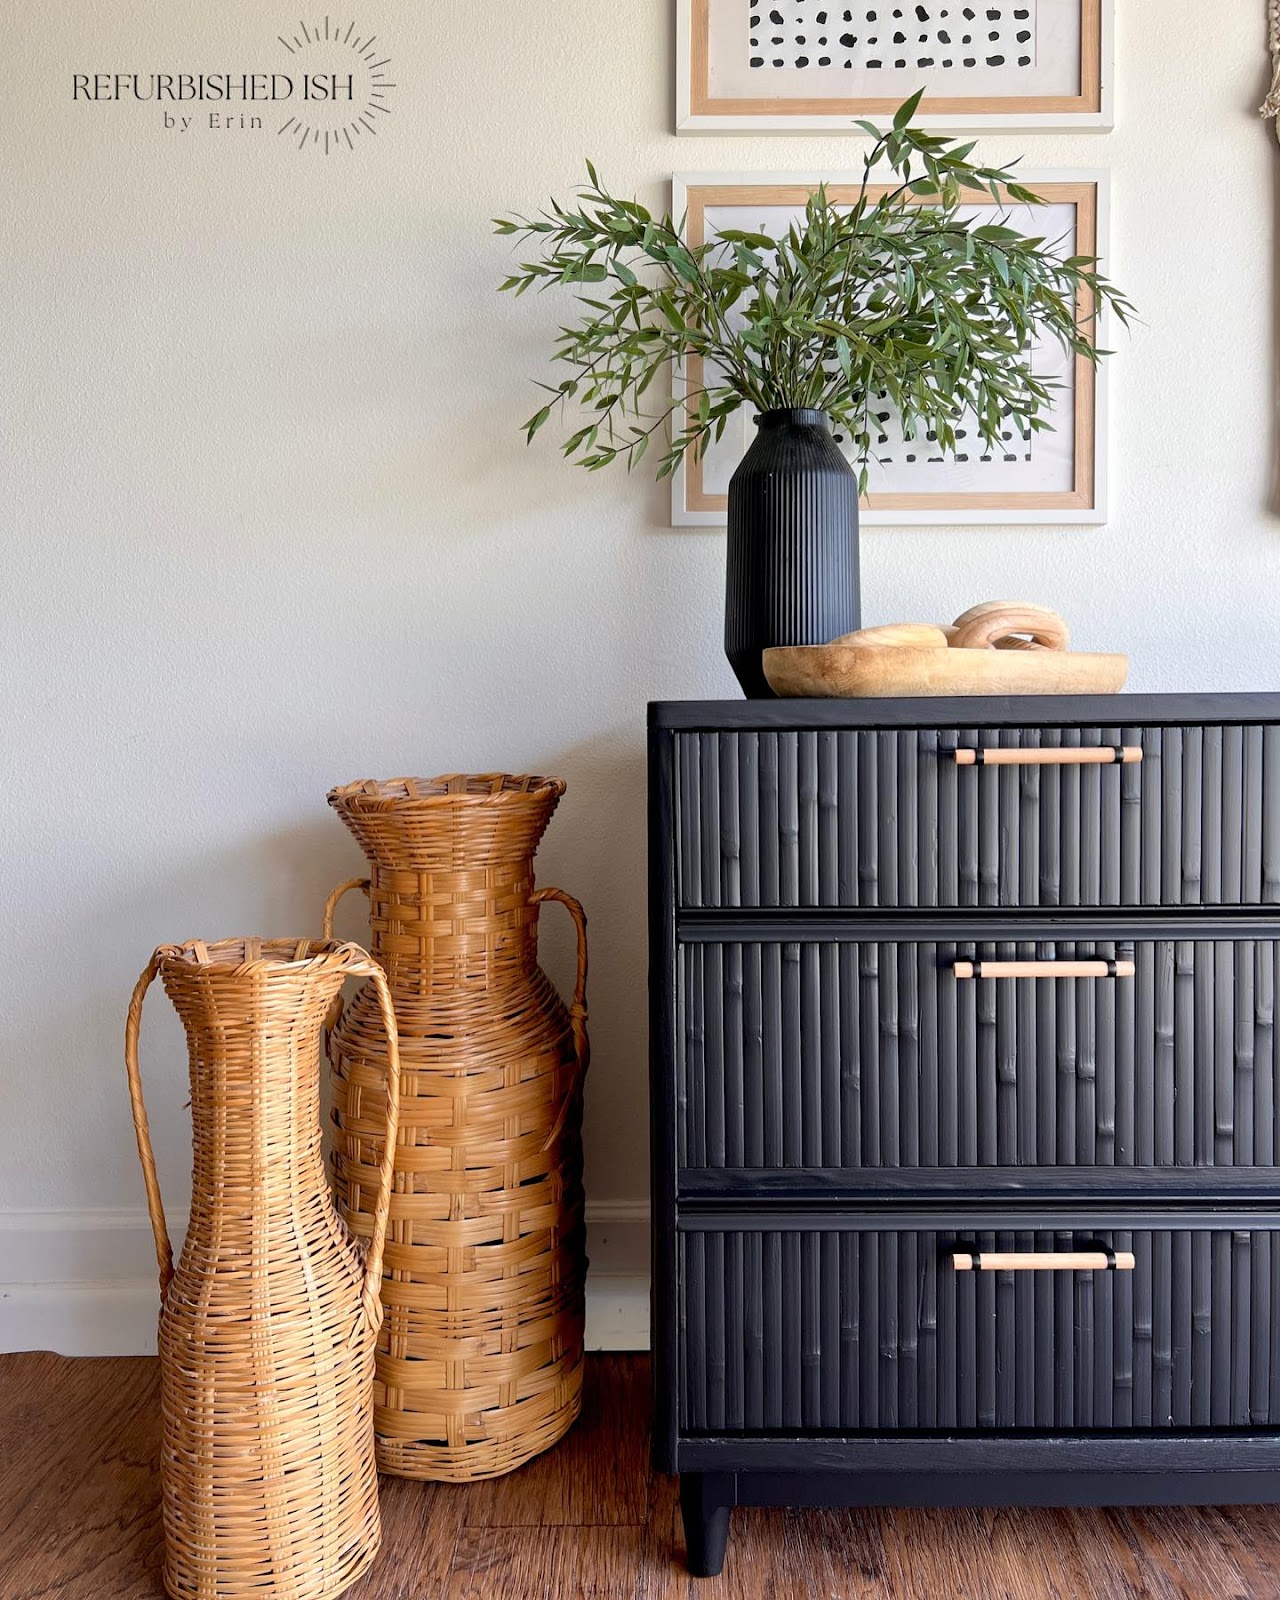
Source @refurbishedish
Incorporate upholstered elements into your dresser for a luxurious touch. Wrap the drawer fronts or side panels in fabric or faux leather, securing it with adhesive or upholstery nails. I used this technique with black faux leather on a client’s dresser, and it added a layer of sophistication and texture. Choose durable, easy-to-clean materials for practicality.
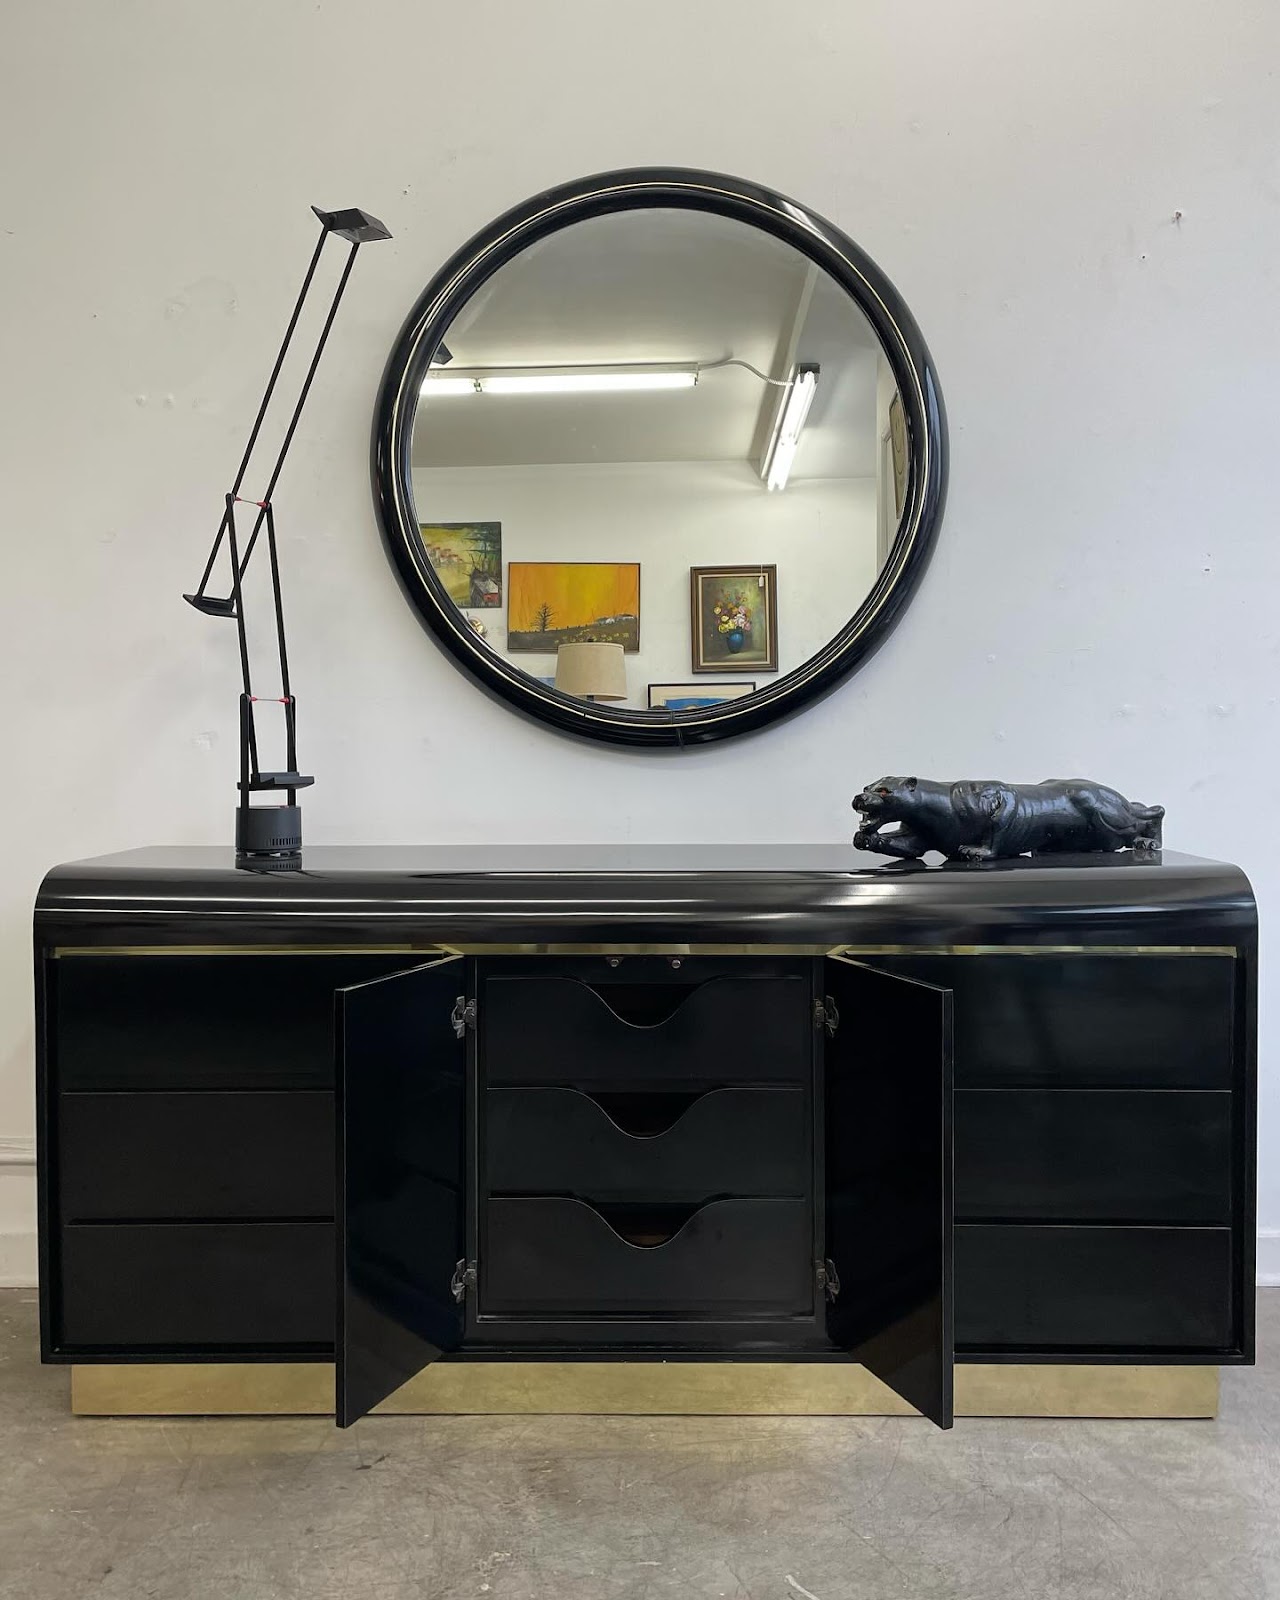
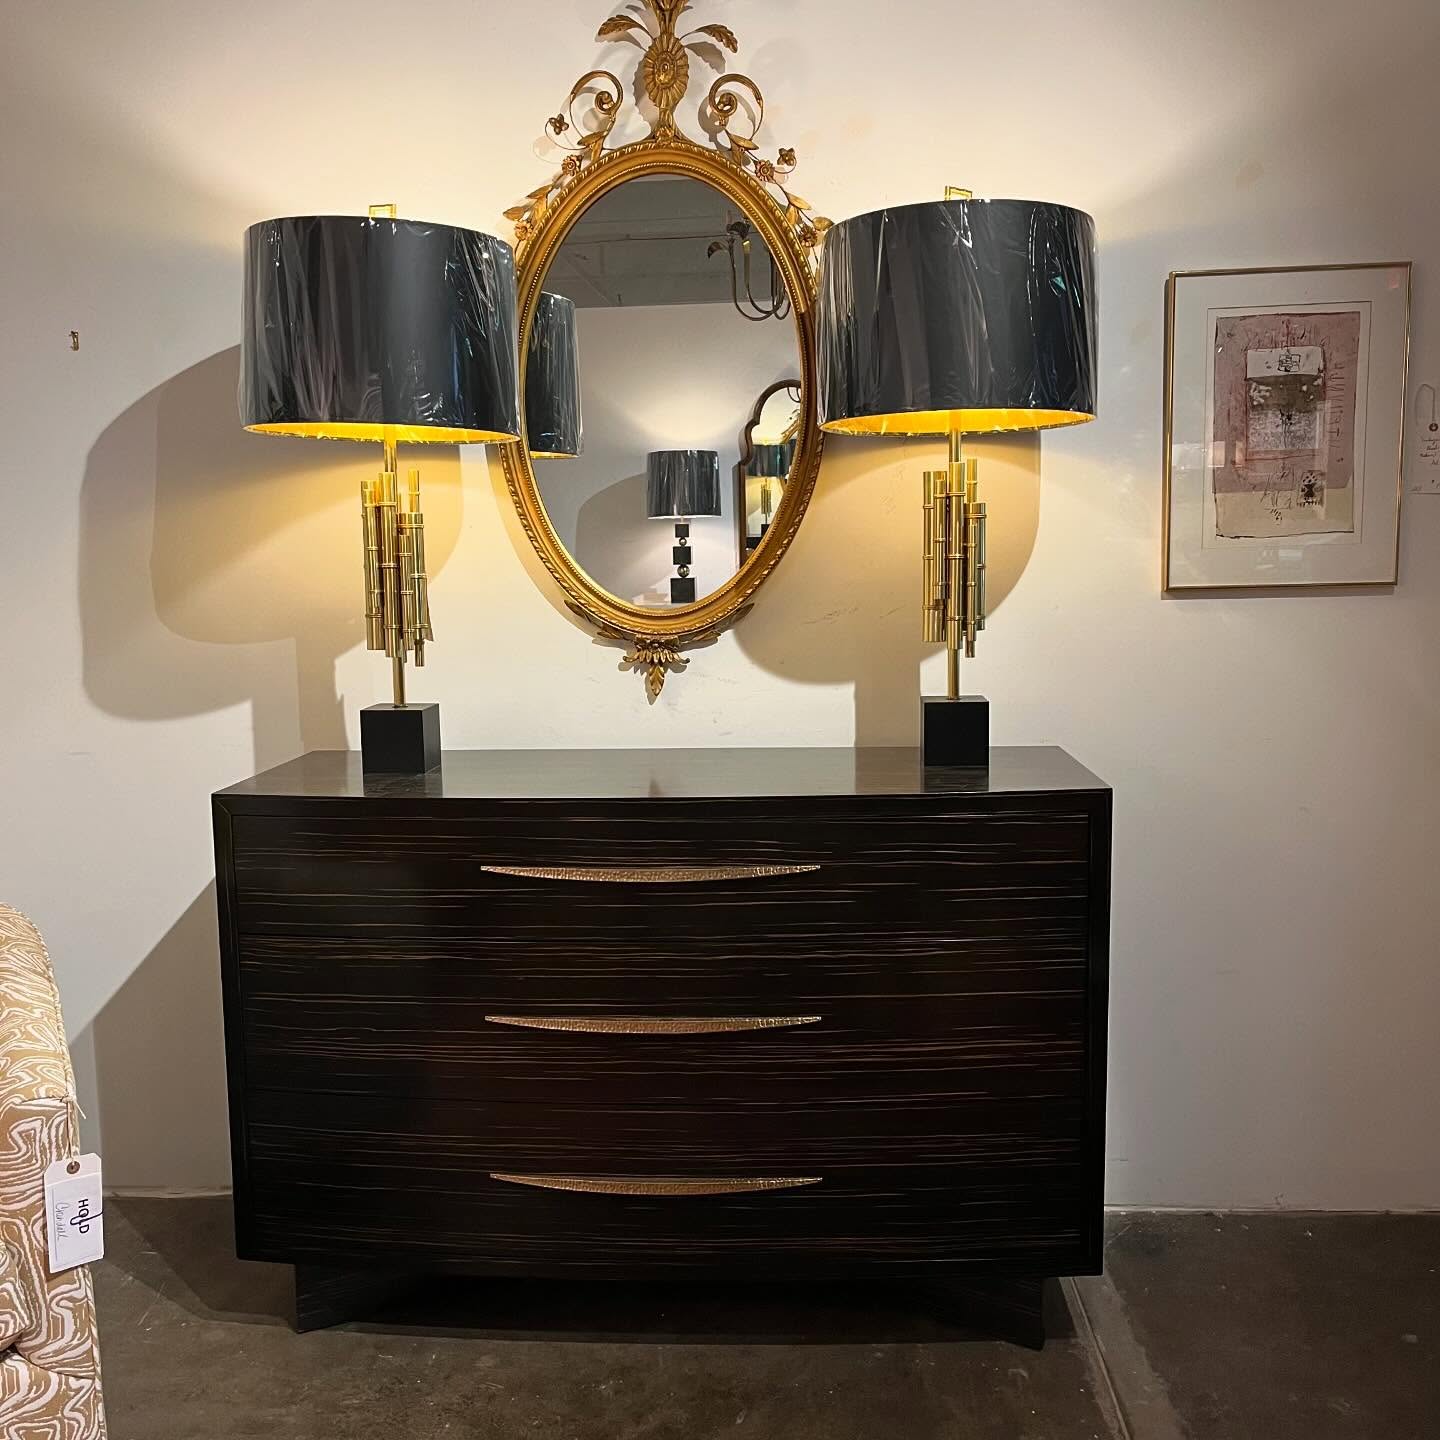
13. High-Gloss Black Finish
Source @styled.byaustin
A high-gloss black finish creates a sleek and modern aesthetic. This style works best for minimalist designs and pairs well with contemporary decor. Use a gloss enamel paint and apply multiple thin coats for a smooth, reflective surface. I used this finish on a narrow office dresser, and it became a functional yet stylish addition to my workspace. Keep the design simple to emphasize the gloss’s striking effect.
14. Add Lighting
Source @slateinteriors
Incorporating LED strip lighting adds a dramatic and functional touch to your dresser. Place the lights along the back edges or underneath the dresser to create a subtle glow. This idea is perfect for modern bedrooms or gaming setups. I installed LED lighting on a black dresser in a client’s room, and it became a standout feature that added ambiance and style.
15. Geometric Overlays
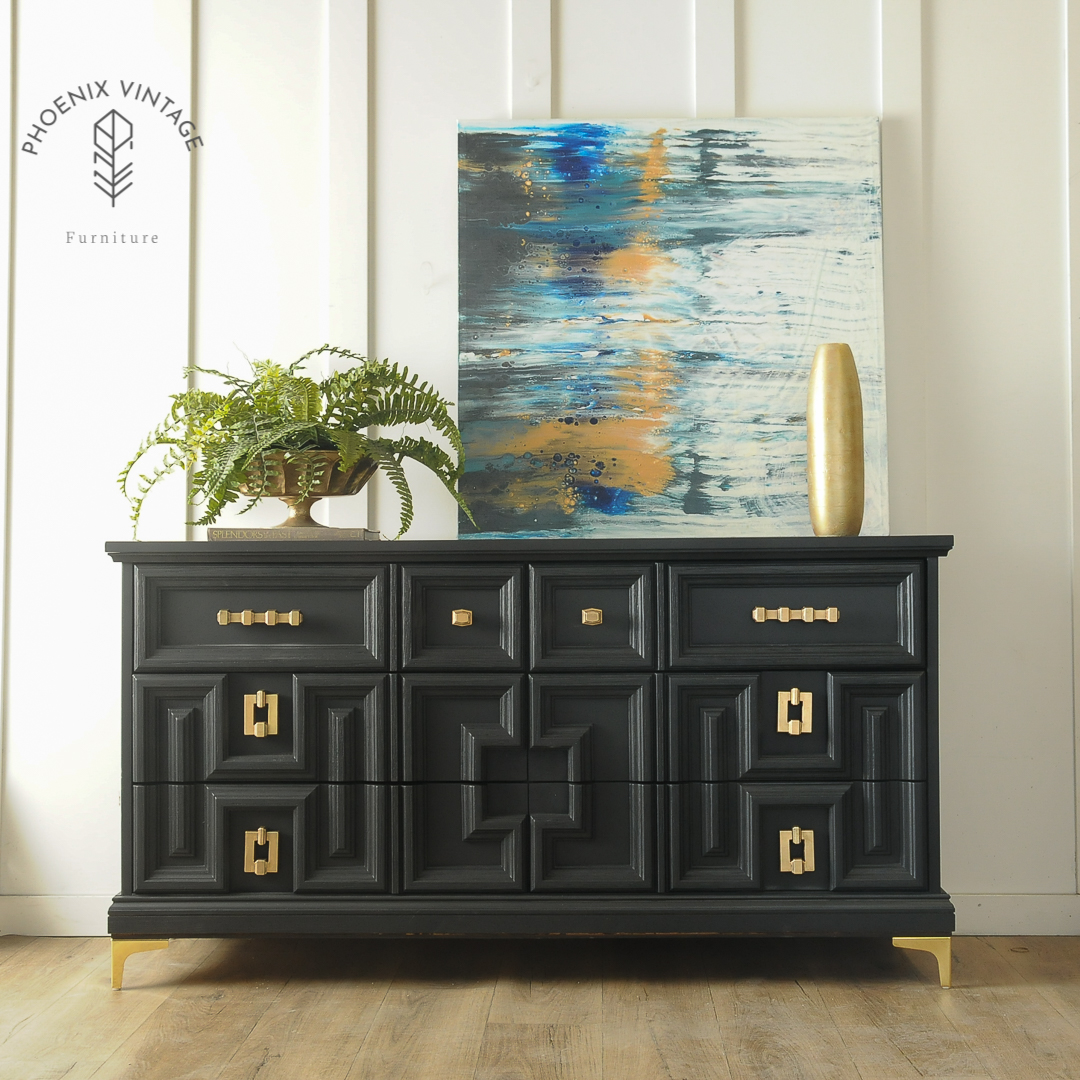
Source @phoenixvintagefurniture
Create bold geometric designs using wood cutouts or adhesive vinyl. Attach the shapes to the dresser’s surface before painting it black. This method adds depth and dimension, making the piece visually striking. I designed a modern nursery dresser using this technique, and it became the room’s centerpiece. Experiment with different patterns and layouts for a custom look.
16. Faux Marble Top

Source @marbleandgraniteinc
A faux marble finish adds elegance and sophistication to your dresser’s top surface. Use black and white paint to create a realistic marble effect, then seal it with a high-gloss topcoat. I applied this technique to a hallway dresser, and it became a luxurious addition that looked far more expensive than it actually was. This approach is perfect for entryways or formal spaces.
17. Hidden Compartments

Source @hiddentreasuresthriftstore1
Add hidden compartments to your dresser for a functional upgrade. Modify the interior to include secret storage spaces for valuables or small items. This idea works particularly well for dressers used in home offices or bedrooms. I customized a dresser for a client who needed extra security, and it provided both practicality and peace of mind.
18. Washi Tape Accents
Source @redesignwithprima
Washi tape is an inexpensive and temporary way to add color and design to a black dresser. Use tape to create stripes, patterns, or borders on the drawer fronts. This technique is ideal for renters or those looking for a quick, reversible update. I helped a college student decorate their dorm room dresser with washi tape, and the result was fun and creative.
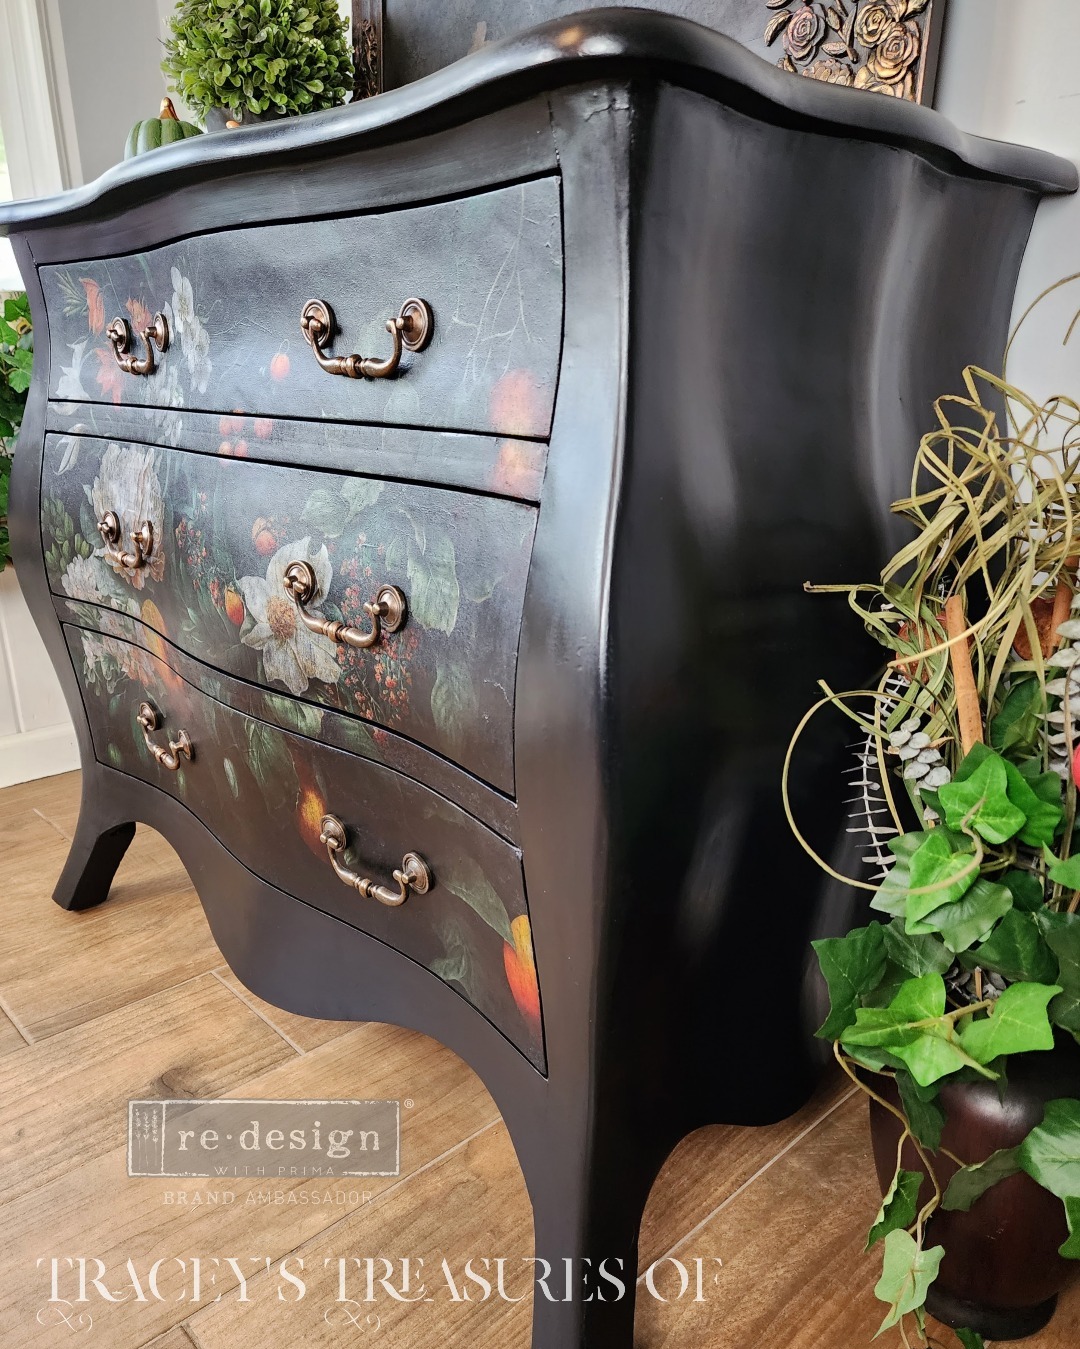
19. Gallery Art Dresser
Source @randrinteriordesign
Transform your dresser into an art piece by transferring prints or images directly onto the wood. Use decoupage techniques to apply botanical prints, abstract designs, or even family photos. I once worked on a dresser that featured vintage botanical illustrations, and it became a truly unique and personal piece. This method allows you to customize the dresser to reflect your personal style and interests.