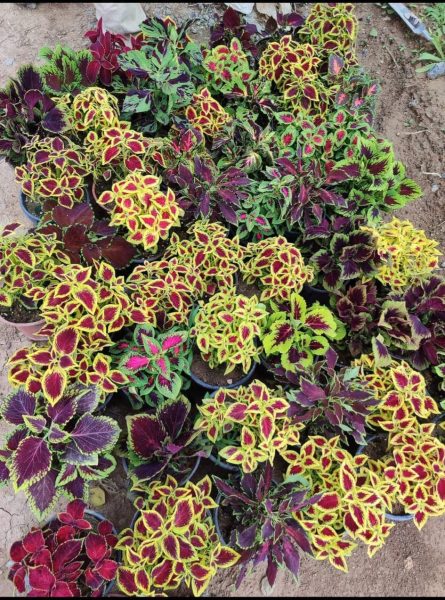
Unfortunately, a single coleus plant won’t naturally grow multiple distinct colors. However, there’s a technique called grafting that allows you to achieve this effect.
Now, you might be wondering, “How is that possible?” or “Isn’t that something only professional horticulturists can do?” Fear not.
In this article, we’re going to learn this process, walking you through the grafting so that you can create your very own colorful coleus plant.
What is Grafting?
Grafting is a technique that involves joining two plants together so they continue their growth as one.
The plant that provides the roots is called the rootstock, while the plant that is grafted onto the rootstock is known as the scion.
When done correctly, this technique can produce a single plant having the characteristics (and in our case, the colors) of both donor plants.
How to Graft Coleus to Make Her Colorful?


Step 1: Select Your Plants
The first step in this is to select the coleus plants you wish to merge.
Look for plants that are healthy, vibrant, and, most importantly, display the colors you want to combine.
It’s like picking the paints for a canvas—except in this case, the canvas is alive!
Step 2: Prepare Your Tools
Grafting requires precision and cleanliness to ensure success.
Gather a sharp knife or grafting tool, grafting tape or clear plastic wrap, and a sterilizing solution to clean your tools.
This preparation is crucial to avoid introducing any unwanted guests (like bacteria or fungi) to your plants.
Step 3: Make the Cut
With your tools sterilized and your plants selected, it’s time to cut—literally.
Carefully cut the stem of your rootstock plant at an angle, and then make a similar angled cut on the stem of your scion plant.
The goal here is to match these cuts so the stems fit together as seamlessly as possible, like pieces of a botanical puzzle.
Step 4: Join the Stems
Now, gently fit the cut stem of your scion plant onto the cut surface of the rootstock. It’s a moment that requires both precision and a delicate touch.
Align the cambium layers (the green layer beneath the bark, responsible for growth) of both plants as closely as possible to encourage them to fuse.
Step 5: Secure the Graft
Using your grafting tape or clear plastic wrap, carefully secure the joined area.
This step is like setting a broken bone with a cast; it holds everything together while the healing and fusing process takes place.
Step 6: Care for Your Grafted Coleus
Place your newly grafted coleus plant in a location that receives plenty of indirect light and maintains a consistent level of moisture. Patience is key here.
Over the next few weeks, keep an eye on the graft site for any signs of growth or fusion.
With proper care, your coleus plants should begin to grow as one, bringing your vision of a multi-colored specimen to life.
Wrapping Up
Grafting offers not just the potential for aesthetic wonders but also the excitement of experimentation.
Each attempt brings new learning opportunities, and each success brings unparalleled satisfaction.
Imagine the possibilities—a single coleus plant with an explosion of color, a living testimony to both nature’s and your creativity.
Why not give it a try? Who knows what stunning combinations you can achieve? The canvas is yours to paint—may your garden be a reflection of your imagination, nurtured into reality through the wonders of grafting. Happy gardening!

